Customer Choices
Customer choices let you give a customer different options for a particular product. Any of the basic HTML form elements can be used.
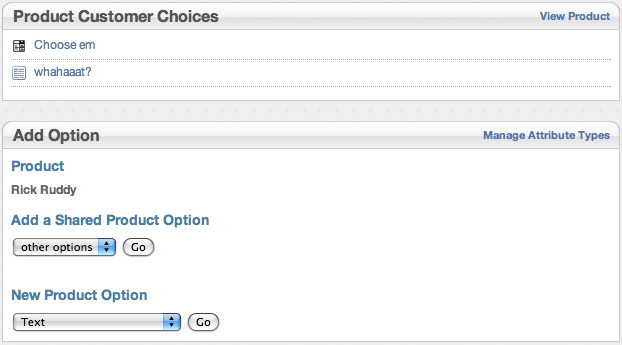
Up top you can see the existing customer choices for the product. The little icon indicates the type of choice. So this product uses a select and a text field. If you click on the name of the choice, you can modify it.
The Add Option section tells you what product you're changing, and has options to add a Shared Product Option or a New Product Option. We'll talk about Shared Product Options and "Manage Attribute Types" later on.
The different types of options:
- Text - Enter one line of text
- Text Area - A longer block of text
- Checkbox - A single yes / no checkbox
- Select - Allows customer to choose from an array of options
The "Product Price" variant of an option will make the price change when that option is chosen.
The "Select - Product Price" is the best to use as an example:
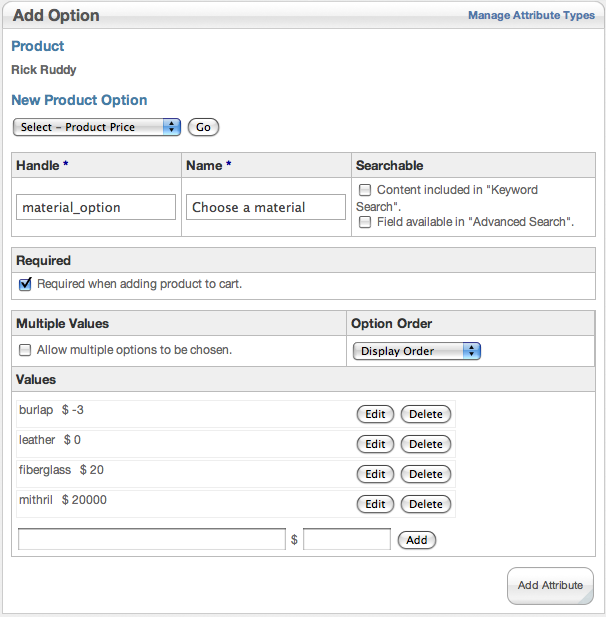
Here is a filled in "Add Option" dialog. You can change the type of option using the "New Product Option" dropdown. You can change everything except the type of option when you edit an existing customer choice. Editing a customer choice also gives you a "delete" button.
The various fields are the same across the different types of options but the Select Product Price has the most complex "Values" area.
- Handle: this is how the field will be written to the database. It only needs to be unique: it is never displayed except here.
- Name: this is what your customers will actually see.
- "Keyword Search:" This field is not used in customer choices.
- "Advanced Search:" This field is not used in customer choices.
- Required: Customer has to choose or enter something. This makes the "checkbox" type required to click for things like "I understand the risks of duck ownership"
The values section is different for each type of option. For the select option, multiple values will display the options as a list of checkboxes. When just one can be chosen, the list is a normal "dropdown" sort of widget. The options can be shown in any order. You set the display order by dragging and dropping the different options where you want them.
On an option that controls price, you can put whatever value you want to raise or lower the price. Other types of customer choice let you pick a default value.
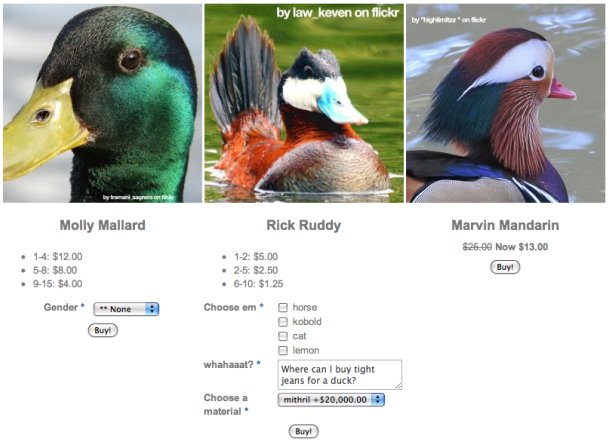
This is what a customer will see when they are trying to buy your product. The blue asterisks show required fields.
Global Customer Choices
In some cases, you're going to want all of your products have the same options. To set up an option that you can add to any product you can go to eCommerce's Settings -> Customer choices.
The dialogs are the same as the per-product customer choices but after you create some they will be available in the select box for "Shared Product Option" when you are adding a new customer choice to a product.
Manage Attribute Types
This is where you can add or remove different options from everything in concrete5. It's not really something you want to mess with unless you know what you're doing. But in the case of eCommerce it is possible to add to modify what's available to you and see what happens. As an example, you can add the "Date/Time" as a Core Commerce Product Option.
Please note that enabling this will not automagically turn your ecommerce add-on into a scheduling system. It's just a line of text that is a human-readable date, but it could be useful for adding a "desired" time.