Documentation
After Installation, the plugin must be enabled before use:
- navigate to the Rich Text Editor page in the dashboard
Dashboard > System & Settings > Basics > Rich Text Editor
- check the checkbox for "Add and Remove Classes and IDs"
Classes:
- classes are added and removed by typing in the class name into the add/remove inputs in the form popup
- class names are entered without the leading period "."
- multiple classes can be added by space separating each class
- multiple classes can be removed by selecting multiple classes in the select menu
IDs:
- IDs are added by typing in the ID name into the form popup
- ID names are entered without the leading pound sign "#"
- IDs are removed by selecting them from the select menu
Element Selection:
Tag
- will select the closest tag based on the position of the cursor
- this works as a generic tag selector
- the cursor is placed in content
- select Tag from the plugin drop-down menu
Span
- will select the closest span tag based on the position of the cursor
- the cursor is placed inside a span
- select Span from the plugin drop-down menu
Block
- will select the closest block based on the position of the cursor
- the cursor is placed inside a block element
- select Block from the plugin drop-down menu
For information on what block elements are:
https://developer.mozilla.org/en-US/docs/Web/HTML/Block-level_elements
Link
- will select the closest link tag based on the position of the cursor
- the cursor is placed inside a link
- select Link from the plugin drop-down menu
*** when clicking on a link to add or remove a class or ID, a Redactor link popup may be visible, this is Redactor default behavior and can be ignored
Table
- will select the closest table tag based on the position of the cursor
- the cursor is placed inside a table cell of a table
- select Table from the plugin drop-down menu
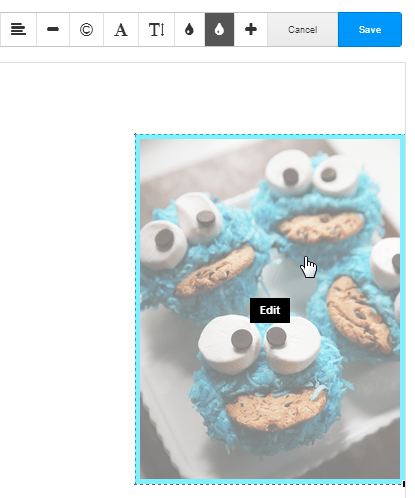
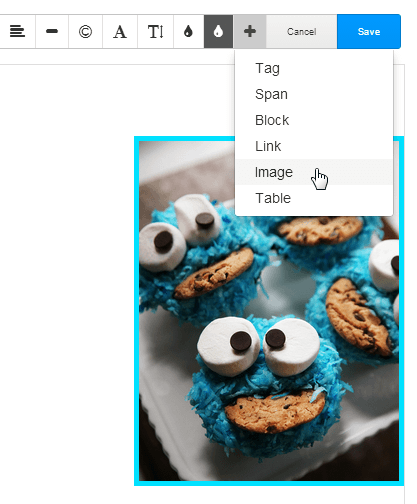
Image
- images are selected and deselected by clicking on them
- a selected image will have a light blue border
- multiple images can be selected at one time
- after selecting an image, or images, select Image from the plugin drop-dowb menu
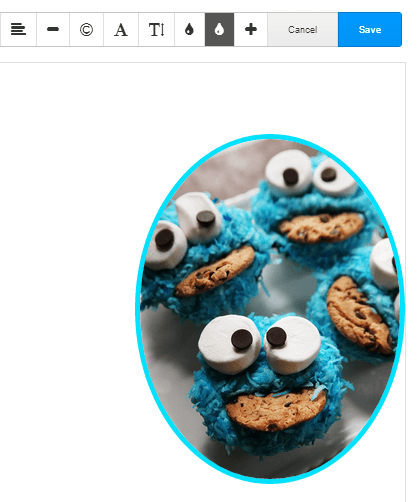
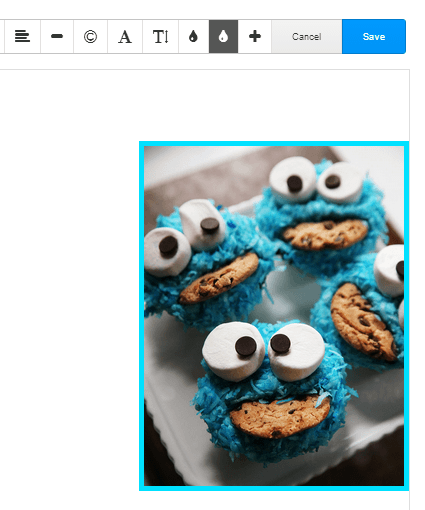
Example: select an image and add a class
1. Add an image.
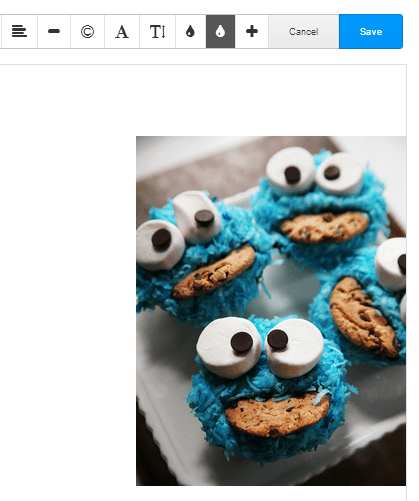
2. Select the image by clicking on it one time. The selected image will have a light blue border. The black dashed border around the image and "Edit" text is part of the default Redactor image editing feature. This default border and text will be seen each time an image is clicked.
3. After an image is selected, it will keep its selection until it is deselected (clicked).
4. With an image selected, select Image from the plugin drop-down menu.
5. In the form popup, add the image class without the leading dot "." and then click the update button.
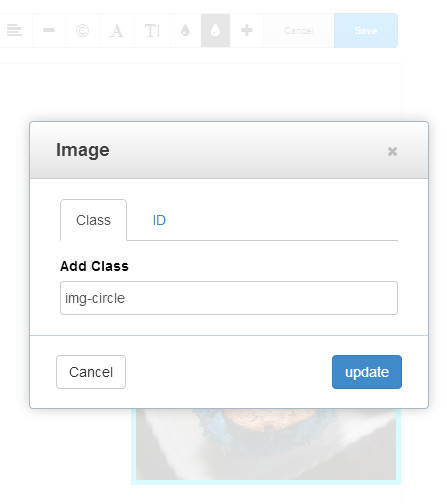
6. The image now has the img-circle class applied to it.